Open source Yocto Project guide
Open source Yocto Project guide for custom Linux on Raspberry Pi with Docker setup tips
Dive into the Yocto Project for custom Linux systems on any hardware. Perfect for developers and embedded systems enthusiasts. Start building now!
Explore the Yocto Project, an open-source initiative for creating custom Linux systems for any hardware architecture. Learn to use CROPS for cross-platform development, set up Docker containers, and build tailored Linux images for embedded and IoT devices. Our guide covers setup on macOS, configuring build environments, and optimizing for Raspberry Pi. Whether you're a beginner or an expert, find best practices, tools, and community support for your Linux project needs.
Yocto running in docker container
In the yocto docs there is a chapter (2.2.2) for setting up CROss PlatformS (CROPS) as alternative to setting up a native linux pc. This alternative uses docker container to build a customized system image e.g. for the Raspberry Pi.
Unfortunately there are some little mistakes in the documentation for setting up this environment for me on Mac OS X (Monterey).
Setup docker container for Mac OS X
For to use the CROPS docker on Linux, Windows and Mac OS X, there are some special settings needed. Before setting up the container for Yocto, you must create a docker volume to store the results. Also a docker samba container is used to provide the files in Mac OS X.
Create docker volume
In a terminal window type the following commands:
docker volume create --name raspberry
docker run -it --rm -v raspberry:/workdir busybox chown -R 1000:1000 /workdir
Create and run a samba container
OSX will not let you connect to a locally running samba share. Therefore, you first have to create an alias for 127.0.0.1 of 127.0.0.2.
sudo ifconfig lo0 127.0.0.2 alias upThen create the samba container, that allows you to see the files in the docker volume:
docker create -t --expose 445 -p 127.0.0.2:445:445 --name samba -v raspberry:/workdir crops/sambaSince you will always need to have the alias to connect to the samba container, you could combine the start of samba and alias like so:
docker start samba && sudo ifconfig lo0 127.0.0.2 alias upNow you can open the workdir in the file browser. In the finder hit "Command-K" and in the server address box type "smb://127.0.0.2/workdir" and click "Connect". Now you should see the content of the docker volume in the finder.
Create and start the Yocto container
To create and/or start the Yocto container type in a terminal window:
docker run --rm -it --name=crops-poky -v raspberry:/workdir crops/poky:ubuntu-20.04 --workdir=/workdirSetup build environment in the container
When the docker container is started, you have a terminal prompt that looks like this: "pokyuser@d4ddfe042587:/workdir".
Now you can setup the build environment.
Clone poky version
In my case I use the Yocto version 3.4 with the name "Honister", because the meta-raspberry layers aren't available for newer poky versions at this time. For the first time you have to clone the poky repository:
git clone -b honister git://git.yoctoproject.org/poky poky-honisterIf you want to update poky to the latest version:
cd poky-honister
git pull --all --prune
Additional meta layers for Raspberry Pi
Change to "poky-honister" and clone the following repositories: meta-raspberry, meta-openembedded and if needed meta-qt5
cd poky-honister
git clone -b honister git://git.yoctoproject.org/meta-raspberrypi
git clone -b honister git://git.openembedded.org/meta-openembedded
git clone -b honister https://github.com/meta-qt5/meta-qt5.git
Setup build config
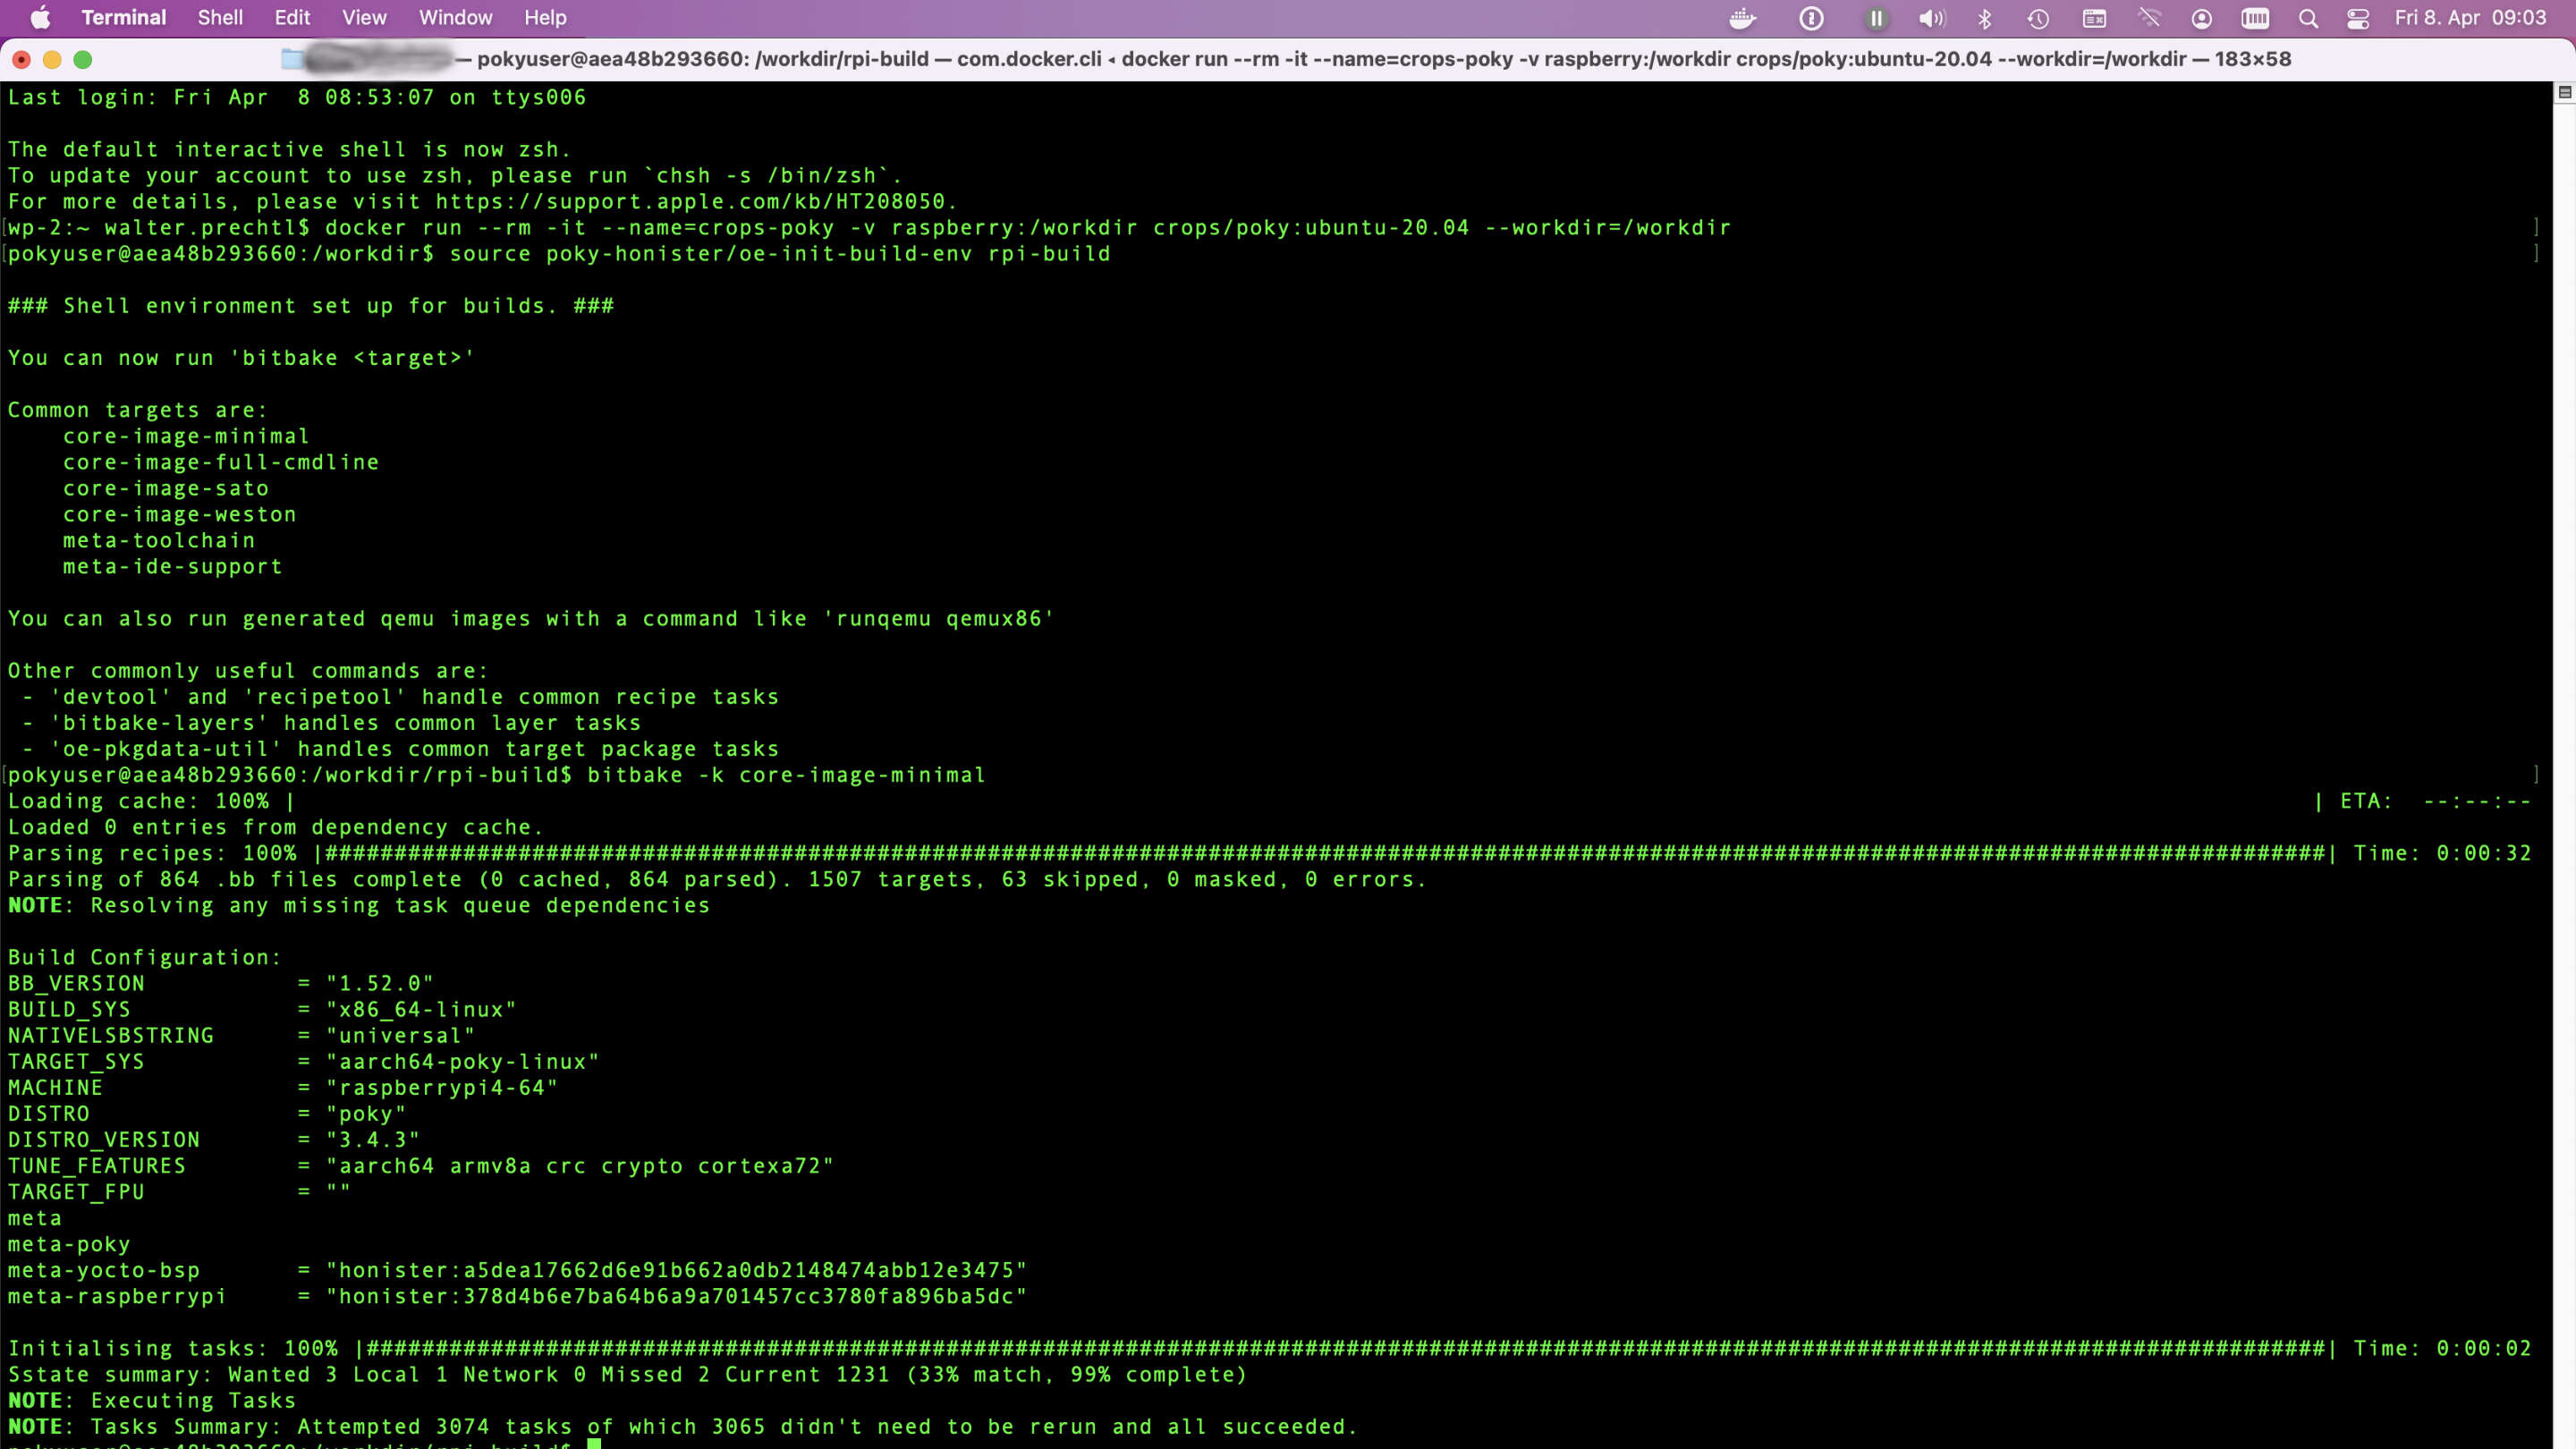
Leave the poky-honister directory, so that you are in the /workdir. Now source the build environment with the script oe-init-build-env.
cd ..
source poky-honister/oe-init-build-env rpi-build
A new directory "rpi-build" - you can name it as you want - and a conf directory with the files bblayers.conf, local.conf and templateconf.cfg is created.
As there is no text editor installed in the container, you either have to edit the config files in the mounted samba volume in Mac OS X or have to install a text editor in the container. To do this, you must open a second terminal window - while the yocto container is running - and start a bash shell in the container with root privileges:
docker exec -it --user=root crops-poky bash
apt-get install nano
exit
Then you can edit the config files in the yocto container as pokyuser.
Note
The editor is not installed permanently. After leaving the container and entering again, you have to install it again
First add the meta-raspberry in the bblayers.conf file
nano conf/bblayers.confAdd "/workdir/poky-honister/meta-raspberrypi " so that it looks like
BBLAYERS ?= " \
  /workdir/poky-honister/meta \
  /workdir/poky-honister/meta-poky \
  /workdir/poky-honister/meta-yocto-bsp \
  /workdir/poky-honister/meta-raspberrypi \
  "
and save it.
Second edit the local.conf
Edit the file local.conf:
nano conf/local.confChange the following lines:
- MACHINE ??= "qemux86-64" -> MACHINE ??= "raspberrypi4-64"
Depending on which Raspberry you want to use (raspberrypi0, raspberrypi0w, raspberrypi3, raspberrypi3-64, raspberrypi4, raspberrypi4-64, etc)
Uncomment the following lines:
- DL_DIR ?= "${TOPDIR}/downloads"
- SSTATE_DIR ?= "${TOPDIR}/sstate-cache"
- TMPDIR = "${TOPDIR}/tmp"
Add the following lines at the end, to get a sdimg to flash to a SD-card:
- IMAGE_FSTYPES = "ext4.xz rpi-sdimg"
- SDIMG_ROOTFS_TYPE = "ext4.xz"
Save the local.conf file.
Bitbake the first image
Now you have minimal settings to build the first image:
bitbake -k core-image-minimalIn the Yocto documentation you find a short description of the available image descriptions.
For example:
- core-image-minimal: A small image just capable of allowing a device to boot.
- core-image-base: A console-only image that fully supports the target device hardware.
- core-image-full-cmdline: A console-only image with more full-featured Linux system functionality installed.
After a while - which could be serveral hours for the first time - the bitbake finishes and you find the sdimg file in the following directory:
/workdir/rpi-build/tmp/deploy/images/raspberrypi4-64Extra configurations
Extra Raspberry hardware configurations
To set specific hardware settings, you can have a look to extra-apps.md and extra-build-config.md. You find this files also in the meta-raspberrypi/docs directory.
The meta layer also provides a image configuration "rpi-test-image" to use with bitbake. The image is based on "core-image-base" which includes most of the packages in meta-raspberrypi and some media samples.
bitbake -k rpi-test-image
Extra software configurations
Depending on what image build configuration you are using, you might need to install additional software packages.
You can do this, by adding some settings to the local.conf file.
For example add the following lines, to set ssh-server, pi-user and systemd:
## packages
IMAGE_INSTALL:append = " openssh-sftp-server sudo python3 python3-pip rpi-gpio raspi-gpio"
IMAGE_FEATURES:append = " ssh-server-openssh"

## systemd settings
DISTRO_FEATURES:append = " systemd"
VIRTUAL-RUNTIME:init_manager = "systemd"
VIRTUAL-RUNTIME:initscripts = ""
IMX_DEFAULT_DISTRO_FEATURES:append = " systemd"
Or add python:
IMAGE_INSTALL:append = " python3 python3-pip rpi-gpio raspi-gpio"Note
The beginning space in " python3 python3-pip rpi-gpio raspi-gpio" is important, because the text is appended to existing configuration and needs to be separated with this space.
Copyright License
Copyright © 2022 Interelectronix e.K.
This Project source code is licensed under the GPL-3.0 license.
Acknowledgments
Sources used in to create this Instructions:
Thanks to all.

